Thursday, September 29, 2011

Check it out!

Today we are linkin' up over at It's a Keeper!
 There are some amazing recipes over there! Go check it out! If you link up, let me know so I can check it out! 

Wednesday, September 28, 2011

Homemade Pizza Rolls

Need I say more? As if people need convincing that pizza rolls are delicious. Well, I suppose those who have been eating the pizza rolls out of the freezer baggies (you know, the ones you microwave in the little pools of nasty grease) they might need some convincing. Here it proof! Homemade pizza rolls. No grease. No microwaving. Easy schmeasy.

Droooool!
Let's just get right down to it, shall we? 
Ingredients:
  • Small Wonton Wrappers
  • Pizza Sauce
  • Italian Blend shredded cheese (or plain mozzarella)
  • Graded Parmesan Cheese
  • Cooking Spray (Canola over here!)
  • Toppings -chopped up!- (For us it was: pepperoni [we use turkey!], green pepper, and onion.)
Show some support for our local store's generic brand! Woot woot!

First, pre-heat that oven to 375! Coat your mini-muffin pan well with the cooking spray, you don't want to fight with these bad boys when see (and smell) how awesome they are!

Press a single wonton wrapper into each mini-muffin space. Be gentle! They can rip pretty easily. Look how pretty already!

Sprinkle a little of the Parmesan and Italian blend cheeses into each wonton. (Just a tad!)  Add a small dollop (I don't measure! Some people like a lot, some a little) of sauce, then add your toppings, followed by an even smaller amount of sauce.


Top with a heaping pinch of Italian blend cheese, and sprinkle with a bit more Parmesan. Make sure there is enough room to pinch together the corners of the wontons!

Note: The actual order of the ingredients doesn't matter much as long as cheese is the top ingredient. Once it starts melting, it helps hold the wonton closed! 


Now, get a small bowl or glass of water and wet your finger tips. Fold in the wontons, and pinch them closed. I added a tiny sprinkle of Parmesan on top. Think more along the lines of "Pot Sticker" not "Crab Rangoon."  See?

The don't have to be perfect. The cheese will help keep them closed! (As long as you put the cheese in last!)

By now, your oven should be a toasty 375! Throw these guys in there! They take about 15-20 minutes to cook. I always leave ours in the full 20 minutes because we like them a bit crunchy! Keep an eye on them-- when they look golden brown around the edges, pop them out. But let them sit! I know it is hard, but just let them sit for like two minutes! You can do it! But look how good they look...


 Ok, you made it the two minutes! Get out a spoon (I prefer a spoon-- that way you don't snag the pizza roll with a fork prong or anything...) and put these right on your plates! They are very hot. Very VERY hot. So blow on them until they won't give you 3rd degree burns of the mouth. Please. Ok, good. Now, enjoy!

Getting excited!

Tonight it is homemade pizza rolls! I will post pics and the recipe later tonight after the little one falls asleep!

My hubby and I created them when we tried cupcake lasagnas the first time. Those were delish, but this is so much better!

Tuesday, September 27, 2011

Bird of Halloween Past

At this time last year, I was a noob in the wonderful world of crafts. Ok, not really. I have always been a crafty kind of girl. But I took a big plunge last year and decided to make Lil'bug's Halloween costume. After weeks of "She would be such a cute [insert random costume here]!" I finally picked an idea! She was going to be a hatching bird! She was only 3.5 months old, so it had to be something simple-ish and definitely comfy. It took me FOREVER to figure out how to make it, and this is what I came up with.


This year, I am making Lil'bug a gnome costume! Which is proving to be a little more difficult than one would think... but I will pull it off!

Monday, September 26, 2011

Baby Booties

I was spending time with my grandma the other day, and she had a couple pieces from a pattern she used to make baby booties long ago.  She let me take them home to play with! Yay!

I had a sole and one side of the booties. It took some figuring out, but look what I made!


I am going to make another pair sometime this week, and make some changes. I added the ribbon, because there was nothing to keep the shoe on the baby foot. Next time, I am going to incorporate some elastic. I also want to make the sole a little thicker. 

All in all, I call it a success!

Sunday, September 25, 2011

Menu Planning

Well, we didn't stick to our menu plan over the weekend very well. My parents asked us out to supper-- so we are behind a tad! I rotated the meal we missed into this week.


Breakfast
Lunch
Supper
Sunday
Toast and applesauce
Picnic Lunch (sandwiches, chips, fruit, raw veggies)
Supper at Grandma’s!
Monday
Omelets
Panera Bread—love lunch with friends!
Leftovers from Grandma’s
Tuesday
Cereal and fruit
Roast Beef Roll Ups
Grilled Hamburgers
Wednesday
Pancakes
Grilled Cheese
Fajitas
Thursday
Oatmeal and fruit
Spaghetti Squash
Homemade Pizza Rolls
Friday
Fruit yogurt
Turkey Veggie Goulash
Breaded Pork Chops
Saturday
French Toast
Leftovers
Little Ceasars!


I need some new ideas for an easy breakfast around here. Lil'bug won't eat meat, and she is very picky about eggs as well. Any ideas?

Also, I was asked how I made the charts that I use for the menu planning. It is a long drawn out, pain in the bumper process. But I will share it with you. Are you sure you want to know? Ok, then pay close attention. Don't miss any of the steps! 1) Open word. 2) Create a table with 4 columns and 8 rows. 3) List the days of the week down the first column, and "breakfast", "lunch", and "dinner" in the top row. Leave the first block, empty, though. 4)Copy, and paste into your blog.

Ok, I might have been exaggerating about how difficult it actually is. Because it is easy. I always make my tables in word, but I spent about an hour trying to figure out how to create a chart on the blog. I gave up and figured I would just try the obvious "cut and paste"... and it worked! Who knew things could be so easy!

If you have any questions about the process, shoot me an email and I will help you out! Enjoy your Sunday!

Saturday, September 24, 2011

Twisted Bows!

Gnarly, dude! (I couldn't resist.) I recently went on a scrap busting spree to free up some much needed room in the ol' fabric scrap drawer. I shared a photo of one of the projects with the awesome ladies in my sewing group over on Babycenter. They thought they were cute, and asked me to post a tutorial... so, *wiggle nose, clap arms in front of self* BOINNNGG: The Twisted Bows Tutorial! (Please tell me you caught the "I Dream of Jeannie" reference back there?)

Supplies:
  • 2 rectangles of fabric (2''x3'' works well to start) Note: I use 1/8'' seam allowance. If you prefer larger, you might want a bit bigger rectangle.
  • Sewing Machine
  • Sewing Needing and thread (there is only a tad of hand sewing-- and it doesn't have to be pretty!)
  • Scissors
First you have to cut out your two rectangles of fabric. You will be sewing them together right sides facing in. (Print sides should be on the inside, folks!) Sew around the rectangle leaving an opening large enough to turn the rectangle right side out.
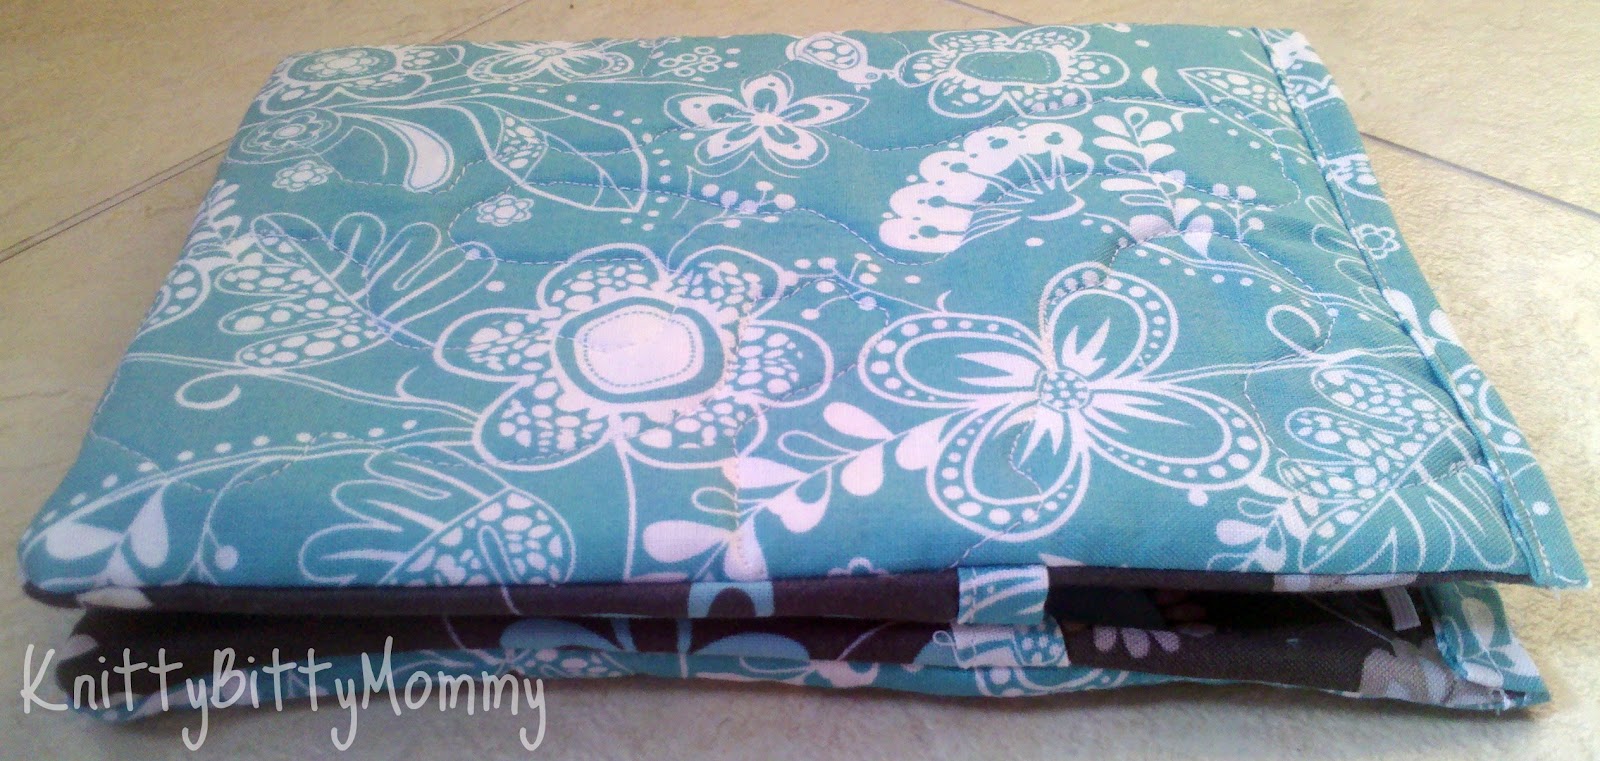
Hint: Sew together like this so you don't have to worry about corners when you turn it right side out!
 Once you get that bit of sewing done, turn your rectangle right side. (You can stick a dullish pencil or something in there to make sure your corners are pointy.) Now, sew the opening closed and topstitch all the way around the rectangle.
For some reason, I couldn't get a good pic of my actual sewing. These are my mad Picnik skills.
Now, time to do the Twist! All you have to do is hold it with both hands, and give it one twist! Basically, it feels like a half of a twist. The left hand stays still, and the right hand does the twist. (Or vise-versa.) Have fun with it! When it looks how you want it put a pin in it to hold the shape, and bust out the needle and thread!

Hand stitch the twist in place by sewing on the back of the bow. Feed the needle in and out making sure to catch just the inner layer of the front of the bow. When the bow's twist feels secure, you are golden! Just tie off a couple knots, trim the ends, and you are done! If you want to make into a hair bow, just hot glue it (or sew it) to the clip of your choice! I hot glued the green one above to an alligator clip. I am going to dew some on a dress for Lil'bug one of these days, too. Possibilities are endless!

Friday, September 23, 2011

Hats, Hats, Everywhere!

As you may know, I have no idea how to follow a pattern. At all. I bought a bunch at Hobby Lobby when they had the $0.99 deals, opened one, and put the whole lot in the bottom of a draw in my sewing room. They are too intimidating for me to even comprehend! (Help?!) This is why I tend to make things up as I go. 

I have been wanting to make Lil'bug a hat with ear-flaps. Yesterday during nap time, I dug out one of her hats that is getting a little snug. I traced it, and then free-handed a bottom piece for the ear-flaps. I had the loudest doubts in my head blasting me the whole time I was trying to make this hat. But I totally OWNED it. And made it reversible! 


Also, I did a couple scrap busting projects! I made a couple coffee cozys, bows, and Christmas tags. I will post those when I have made more. And trust me when I tell you that I seriously needed some scrap busting! Don't trust me? LOOK! 
 Yeah.. that is what I thought. Some of the scraps are pretty small... but when it is a print I love, I just can't throw it away! It is a sickness, I tell you!

Thursday, September 22, 2011

Scrap Bustin' Tonight!

I am enjoying the season premier of The Office with the hubbs right now. It is a little weird without the hilarity of Michael Scott, though. Meh.

We had grilled chicken and salads tonight! Who knew healthy could be so good?!  This was the hubby's salad. His had salad, mozz cheese, peppercorn ranch, bacon crumbles, and grilled chicken. Mine was just salad, peas, light Italian, a little mozz, and chicken. They were delish!


I am super excited to get started on my craftin' tonight! I have been drawing up a pattern for a hat for Lil'big that I want to get made first. Once that is finished, I have about a kazillion little scrap busters that I want to make! My scrap drawer is overflowing, so this really is a high priority. Right? Right!

Tuesday, September 20, 2011

The Definition of "Yumm"

After my delicious Pumpkin Spice Latte morning, my day just got yummier and yummier!  For lunch, Lil'big and I had some soup (Barley Veg... yes, it was from a can. I am not superwoman!) and apples.

But supper was where the magic happened. I have been in role as "wifey" for about 2 years now, and can you believe that today was the first time I have used my crock pot?  I know, I know... it really is sad. But I have learned the error of my ways, and I have seen the light!

Pot Roast -- made how my mama has always made it! (This is the first time I have made it on my own in my house, though!)
  • 10 small red potatoes (cut in halves)
  • Large yellow onion
  • Baby Carrots (about 10-12?)
  • Celery (2 stalks in chunks)
  • 1.5-2 lb Beef roast seasoned with salt and pepper
  • 1/2-3/4 cup of water
  Lined the bottom of the crock pot with a layer of potatoes, then mixed up the onion, celery, carrots, and the rest of the potatoes and put that in. Lay the roast on top and lay a couple onions on top for flavor. Add in the water, then cover and cook for about 8 hours.

It was fall apart tender! So good! My hubby is picky, and he loved it! And the veggies (minus the celery).  Lil'bug ate some carrots and potatoes, but she wouldn't even try the roast. I gave her some pears and part of my bread, too. She will NOT eat meat, so I try and make sure she eats plenty of veggies to get her iron. Border line anemic, and making it hard on mommy to get that iron in her!

Then came the cinnamon apples! I looked online for a good recipe, but they all seemed to call for whole apples... and I didn't want that. So, I wing,wang,wung it!
  • 2 sweet apples (we used Gala, but Fuji or whatever would work)
  • 1 tart apple (Granny Smith, ya'll!)
  • 2 1/2 Tbs Sugar
  • 1/2 Tbs Cinnamon
  • Couple dashes of pumpkin pie spice
  • 2 Tbs water
  • 1 Tbs butter
Mix up, and cook covered on medium heat. Stir occasionally and cook until tender. (However you like 'em!)

I am so sorry I didn't get any pictures of the deliciousness! It all smelled and looked so good, I didn't even think of it!
P.S. If you had noticed, we are a day behind in our Menu Planner. On Sunday, my hubbs was helping my folks do more demolition on their house, so they ended up taking us out for supper! They are too sweet! Sorry for the confusion!

Homemade Pumpkin Spice Latte -- Verdict!

As I mentioned yesterday, THIS amazing post over at loveveggiesandyoga describes how to make a Pumpkin Spiced Latte at home. I tried it! With a few differences-- regular skim milk instead of almond milk, 2 tsp brown sugar as suggested, and I didn't have any whipped cream. It was delish! When I first mixed the pumpkin milk mixture and the coffee, there was very little heat left to my drink and not much coffee taste, but it was still so yummy! Try it! It is easy!

In the future, however, I think I will make this pumpkin milk the same, but use it as a sort of creamer instead of as half of the drink. It will still be delicious with a bit more heat and coffee!

I should mention that when I drink coffee (only every single day...) I like it very strong and I don't use creamer or milk or any sugar. This mama likes it straight up! That could be why I felt the need for more of a coffee flavor in the drink.

The pot roast is on and in the crock pot! I just threw everything together like I have always done, and will post that "recipe" and whatever recipe I use to make baked apples later tonight!

Monday, September 19, 2011

Picnic!

The chilly weather has given way, and warmer weather has arrived! It was around 70 this evening around suppertime, and if you caught our Menu Plan for this week, it was corn dogs for supper. I decided, very last minute I might add, that we should have supper outside! So, we piled up the corn dogs, and cut up some fresh apples and raw carrots and took off outside. It was great!

Last night was football for the hubbs, so I took to my sewing machine to try and make a cover for my Kindle. I didn't follow a pattern or tutorial, and it turned out pretty well. If I ever make one again, I will know what to do differently, but I love how mine turned out! Again, sorry for the slack pictures!


Some of the awesome ladies over in my sewing group have led me to THIS awesomeness. Homemade Pumpkin Spice latte. Umm, yes! Going to try this in the morning! I will let you know how it goes! :D

Sunday, September 18, 2011

Weekly Menu Planning

As promised, here is our menu plan for the week! My husband takes his lunch to work everyday and is gone before breakfast, so those two meals are just Lil'bug and I! I will post recipes as I decide which ones to use.

This week everything is set for quick suppers. My hubby has been helping out my parents with the demo of their home. (They have lived on the Missouri River my whole life, and this year it flooded something fierce. Their home was full of water and mold. Now, the water level has dropped, so they are tearing everything apart so they can clean and whatnot.)


Breakfast
Lunch
Supper
Sunday
Banana Pancakes
Picnic Lunch (sandwiches, chips, fruit, raw veggies)
Corndogs, peas
Monday
Cereal and fruit
Spagettios
Pot roast, potatoes and carrots, cinnamon apples
Tuesday
Oatmeal and fruit
Soup
BBQ Chicken Sandwiches, string beans
Wednesday
Fruit yogurt
Baked Potatoes
Grilled chicken salad
Thursday
Scrambled eggs
Mac and Cheese
Waffles
Friday
Toast and fruit
Chicken Salad
Grilled hamburgers, sweet potato fries
Saturday
Donuts
Left-overs
Eat out

Saturday, September 17, 2011

Hat fever!

Last night was supposed to be our Saturday Night Live-athon, but DH was really into some strange movie that I didn't want to see. So, what would anyone do? Make some hats, of course! First, I loomed Lil'bug a nice warm hat for winter. Although it isn't winter yet, it is starting to get chilly! I wanted to make her a hat that is more appropriate for this autumn chill.

I have never sewn a hat before, but I have been working a lot with knits, and thought it would be a great opportunity to try! I dug some stretchy fabric (a pretty heather lavender from Walmart- only $1/yd!) out of my stash and started thinking, and cutting, and pinning, and sewing... and ta da! My very own version of a slouchy hat! It turned out so cute, I wanted one for me as well. Now we have matching hats! Here are some pics that I took on my cell phone. Sorry for the bad quality-- it was cold and cloudy and I didn't want to go dig out my camera. 


I can't believe how fast today has flown by! What is happening?


Friday, September 16, 2011

Check it out!

So. I spent all of naptime (plus a little extra while daddy played with Lil'bug when he got home from work) making this blog my own! I think Blogger has a ton of great resources for bloggers to use to customize things. However, I wanted to use something I was familiar with so I stuck with Picnik! I found Picnik when I was a poor college student, and I couldn't afford Photoshop. It is a great FREE photo editor! There are some features that are available only to Premium members, which costs a low fee. (I have never paid. But I consider it often! I will probably be making the plunge here before Christmas.) Defiantly check it out!

Tonight it looks like a Saturday Night Live-athon with the hubbs. We are still fighting colds, and just want to take it easy. Tomorrow, MENARDS! We are going to be picking out new flooring for our kitchen and dining room, cabinets and counter tops for the kitchen, and a new sink/vanity for the bathroom. Notice that I said, "picking out." This is going to be a lengthy process. We don't have it in our budget to do all of these things at once! Though, I am having a hard time deciding where to start. Thinking: cabinets, counter tops, flooring, bathroom. What do you think?

Also, I have decided that on Sundays I am going to be posting my menu planning for the whole week. I have never been much of a menu planner, but we eat out too often! I really want us to start making more healthy, frugal choices.

I hope everyone has had a wonderful Friday! Enjoy your weekend!

Thursday, September 15, 2011

What's for Supper?

It is about 55 degrees (F) outside tonight, and the three of us are fighting colds. Now, most of you are probably thinking "SOUP [Duh, Ashley]" but you don't know my hubby. He won't eat anything resembling soup, (gravy, sauces, etc...) So, I opted for spaghetti. When we got married, he had never really eaten pasta. (Never even tried Mac and Cheese! Whhaaat?!) But he will eat spaghetti now and again.

So, Lil'bug and I ran to the store and got some hot Italian sausage and came home and made supper. Delish!

What did you have for supper?

P.S. Thanks for the Boxy Advent Calender love! <3

Boxy Advent Calender Tutorial!

Good morning! As promised, I am posting the tutorial to my Boxy Advent Calender. This is my first tutorial, so I apologize in advance if I miss some steps. If you have any questions at all, please contact me and I will clear up any confusion!

Supplies: 
  • 24 small cardboard boxes I got various shapes (hearts, ovals, stars, squares, etc.) from Hobby Lobby for $0.99 each. Grab a couple of extra... just in case!
  • Bulletin board- mine was 17in x 23in -and thumb tacks (or strong magnets if you are going the fridge route!)
  • Acrylic Paint, sponge brush, and painter's tape.
  • Holiday scrapbook paper
  • Modge Podge (or similar substance)
  • Stencils or Stickers for the numbers (make sure they will fit on the little boxes)
  • Scissors (or Xacto Knife with mat)
  • Pencil
First, I taped off the cork part of my bulletin board so I could paint the frame. I did one coat of bright red. Then I decided it didn't look good with the paper choices I made, so I painted over it very thinly with green. There are little peeks of red showing, and it ended up looking great. Check it out in the final product!

While that was drying, I started the boxes! (Note: if you want to paint your boxes, go for it! I like the way it looked unpainted though. If you do paint them, make sure they are completely dry before you start any of these steps!)


Take the lids off of each box and trace them on the back of your pretty paper. I had a few of each shape, but every box was different. I ended up tracing each lid individually so that the paper would fit perfectly on that box. Once they are traced, cut them out!

Modge Podge it up! 
Paint a thin layer on the lid.

Paint a thin layer over the top!


Place the paper on top of the sticky lid.


Let them dry-- you will know when they are dry because the Modge Podge will be completely clear and shiny! It doesn't take long, just be patient! Please! :) Ok, thanks!
Time to let them dry-- some look like they already are!

Once they are totally dry, break out your stencils! (or stickers! or whatever you are using for numbers!) I used stencils and white paint mixed with a tad of gold for some shimmer. This takes time. Practice before you start!
Just dab over the number. Once you get it perfected, it is easy schmeasy!
On a side note, if you do happen to mess up a tad, have a damp sponge handy. Wipe the paint off quickly, and dry off the lid. Modge Podge makes a very forgiving surface!

When the numbers dry, you are basically done. But now you have to make a decision. What type of calender do you want? There are two ways to progress here. (Gosh, it feels almost like one of those old mystery books you would read as a kid with a "pick your own ending!" I always cheated and read both. Shh!) Anyway, there is Fridge Style and Bulletin Board Style. (I felt the need to use my uppercase letters there. I don't know...) 

First, I will show you the Fridge Style. All you have to do here is use some super strong glue (I used Gorilla Glue) and glue the strong magnets to the back of the boxes. Let it dry OVERNIGHT. Trust me. :) Once they are dry, you are done! Congratulations! Put them up on your fridge and admire your work!


Alternatively, you can rock the Bulletin Board Style! For this one, take the thumbtacks that you have and press them through the back of each box (in the center, towards the top). Then, press into the bulletin board! Ta da! Check it out!


Now, I am working on a list of things to fill the boxes with. Since Lil'bug will be only 17 months old, there won't be candies and things. I am thinking more along the lines of fun activities we can do together. Read Christmas stories, look at Christmas lights, have a Christmas music dance party! I will perfect my list, and add it here closer to Christmas.

Thanks for checking out my first tutorial! I am completely open to feedback! <3

Wednesday, September 14, 2011

Advent Calender!

Well, it is almost 1:00am here in freezing cold (yay!) Iowa. I have finally finished the Advent Calender that I started around 8:30. But it is 1:00, and I love all of you very much... but this mommy needs some sleep! Lil'bug will be up and at 'em around 8:30 or so. I promise to have the Advent Calender tutorial up and running tomorrow! Until, check it out! (It is sitting out so everything can dry. I will hang it and get some better pics in the morning!)

Here we go!

Hello, blogging world! I am looking forward to sharing some of my favorite things with you. First things first. Even though I created this blog to share my adventures in crafting, cooking, sewing, etc.,I  will probably be talking your ear off (eyes off? Gross.) about my adorable 14 month old (wait a minute, when did that happen! I just left the hospital with her yesterday!) daughter.  It all flows together most of the time anyway. Pretty much everything I do, I do for her. I am sure there will be mention of my amazing hubby from time to time as well. He pretty much rocks. No, I am not bias. Well...

Anyway, tonight I am super excited to start working on our Advent Calender! I am going to take a bunch of pics, and try to make a tutorial of sorts. It will be my first one, so I am looking forward to some feedback if anyone has any!

Thanks for checking out the new blog! We hope you stop back soon!